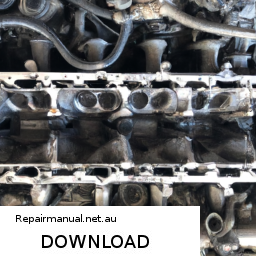
Repairing the alternator on a Cummins B Engine (V4 or V6) involves several steps. click here for more details on the download manual…..
- Swap Your Cummins for a NEW Cat Engine! Cat is Making New Truck Engines. In this video we are discussing the new content Cat engines that are available. You can also swap a Cummins or Detroit for a Cat …
- Cummins Valve Adjustment // Simple Procedure Explained Every 100k miles or so you will want to perform a Cummins valve adjustment procedure. In this short video I’ll show you the …
Here’s a detailed guide, using bullet points to outline the process and the tools required:
### tools and Equipment Needed:
– **Socket Set**: A complete set, including both metric and standard sizes, for removing and replacing bolts.
– **Wrenches**: Both open-end and box-end wrenches in various sizes to accommodate different fasteners.
– **Screwdrivers**: A set of Phillips and flathead screwdrivers for removing covers and electrical connectors.
– **Pliers**: Needle-nose pliers for gripping small components or connectors.
– **Torque Wrench**: For properly tightening bolts to the manufacturer’s specifications.
– **Multimeter**: To check voltage output and diagnose electrical issues.
– **Battery Terminal Cleaner**: To clean corrosion from battery terminals.
– **Wire Brush**: For cleaning any rust or debris from the alternator and mounting surfaces.
– **Replacement Parts**: Depending on the diagnosis, you may need brushes, diodes, bearings, or a complete alternator.
– **Safety Gear**: Gloves and safety glasses for personal protection.
### Repair Steps:
– **Safety First**:
– Disconnect the battery terminals to prevent any electrical shorts or shocks while working on the alternator. Always remove the negative terminal first.
– **Locate the Alternator**:
– Identify the position of the alternator in the engine bay. On a Cummins B Engine, it is typically mounted on the front or side of the engine.
– **Remove the Drive Belt**:
– Locate the serpentine or V-belt securing the alternator. Use a wrench or a belt tensioner tool to relieve the tension on the belt and carefully remove it from the alternator pulley.
– **Disconnect Electrical Connections**:
– Carefully disconnect the electrical connectors from the alternator. This usually includes a main power wire (often a ring terminal) and a smaller connector for the voltage regulator.
– **Unbolt the Alternator**:
– Use a socket or wrench to remove the bolts securing the alternator to its bracket. Be sure to support the alternator as you remove the last bolt to prevent it from falling.
– **Remove the Alternator**:
– Carefully lift the alternator out of its bracket and set it on a clean work surface. Inspect the mounting area for any debris or corrosion that may need cleaning.
– **Diagnose the Issue**:
– Using a multimeter, check the voltage output of the alternator to determine if it is functioning correctly. A healthy alternator should output between 13.8 and 14.5 volts when the engine is running.
– Inspect the alternator for signs of wear, such as worn brushes, damaged diodes, or noisy bearings.
– **Replace or Repair Components**:
– If the alternator is repairable, disassemble it by removing the end cover. Replace any worn components, such as brushes or bearings.
– If the alternator is beyond repair, proceed with installing a new or remanufactured alternator.
– **Reassemble the Alternator**:
– If repaired, reassemble all components in the reverse order of disassembly. Ensure all parts are securely fastened and properly aligned.
– **Reinstall the Alternator**:
– place the alternator back into its mounting bracket and secure it with the previously removed bolts. Tighten to the manufacturer’s torque specifications using a torque wrench.
– **Reconnect Electrical Connections**:
– Reattach the electrical connectors to the alternator, ensuring that they are securely fastened and free of corrosion.
– **Reinstall the Drive Belt**:
– place the drive belt back onto the alternator pulley, ensuring it is properly aligned with all other pulleys.
– **Reconnect the Battery**:
– Reconnect the battery terminals, starting with the positive terminal followed by the negative terminal.
– **Test the Installation**:
– Start the engine and check the alternator’s output using the multimeter. Additionally, listen for any unusual noises and watch for any warning lights on the dashboard.
– **Final Checks**:
– Inspect the area around the alternator for any tools left behind or signs of leaks. Ensure that all components are secure and functioning normally.
By following these steps and using the right tools, you can successfully repair or replace the alternator on a Cummins B Engine V4 or V6. Always refer to the engine’s service manual for specific torque specifications and electrical diagrams.
An engine mount is a crucial component in a vehicle’s structure, designed to secure the engine to the chassis while minimizing vibration and noise transmitted from the engine to the cabin. Typically made from a combination of metal and rubber, engine mounts serve multiple functions that are vital for the performance and comfort of a vehicle.
The primary role of an engine mount is to hold the engine in place, ensuring it remains stable during operation. As the engine runs, it generates various forces, including torque and vibrations. The engine mount absorbs these vibrations and reduces the noise that could otherwise permeate the cabin, enhancing the overall driving experience. The rubber component of the mount acts as a dampener, allowing for some movement while still providing necessary support.
Engine mounts come in different designs, such as solid, hydraulic, or liquid-filled, each tailored to specific vehicle requirements and performance characteristics. Hydraulic mounts, for example, can adjust to different driving conditions, providing a softer ride during normal operation and firmer support during aggressive driving maneuvers.
Over time, engine mounts can wear out or become damaged due to exposure to heat, oil, and constant stress. Symptoms of a failing engine mount may include excessive engine movement, vibrations felt in the cabin, or unusual noises when accelerating or decelerating. Regular inspection and maintenance of engine mounts are essential to ensure the longevity and smooth operation of a vehicle.