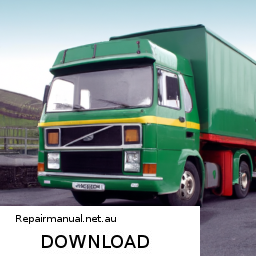
Flushing the transmission fluid on a Volvo F16 lorry bus is an important maintenance task that helps ensure the vehicle operates smoothly and efficiently. click here for more details on the download manual…..
- Volvo Power + 90 ton + Mercedes 🙂 #volvotrucks #youtubeshorts
- Manual volvo transmission. Changing from 1st to 12th gear in a 02-03 Volvo FM9 300 manual. Shifter got same patterns in the Volvo FH series too. It’s a 3 …
While this guide provides a basic overview, it’s crucial to consult the vehicle’s manual for specific instructions and safety precautions. Here’s a simplified step-by-step guide to help you understand the process:
### What You Will Need:
– New transmission fluid (check the owner’s manual for the correct type)
– A transmission fluid flush machine (optional, many garages have these)
– A container for old fluid
– Wrenches or sockets
– Funnel
– Safety gloves and goggles
– Rags for cleanup
### Step-by-Step Guide:
1. **Safety First**:
– Park the bus on a level surface and turn off the engine.
– Engage the parking brake and wear safety gloves and goggles to protect yourself from spills.
2. **Locate the Transmission**:
– The transmission is usually located under the vehicle, towards the rear. Consult the owner’s manual if you’re unsure.
3. **Drain the old Fluid**:
– **Find the Drain Plug**: look for the transmission drain plug, which is typically at the bottom of the transmission pan.
– **Prepare to Drain**: Place a container under the drain plug to catch the old fluid.
– **Loosen the Drain Plug**: Use the appropriate wrench to carefully loosen and remove the drain plug. Allow the old transmission fluid to completely drain into the container.
4. **Replace the Drain Plug**:
– Once all the fluid has drained, clean the area around the drain plug, then reinsert and tighten the drain plug securely.
5. **Flush the System (if applicable)**:
– **Using a Flush Machine**: If you have access to a transmission fluid flush machine, connect it according to the manufacturer’s instructions. This machine will help remove old fluid from the system by pumping new fluid through.
– **Manual Flush**: If you don’t have a flush machine, you can disconnect the cooler lines (be careful, as fluid may spill) and start the engine briefly to let the old fluid pump out while adding new fluid simultaneously through the filler tube. This step can be complex, so if unsure, consult a professional.
6. **Add New Transmission Fluid**:
– **Locate the Filler Tube**: Find the transmission fluid dipstick or filler tube. It’s usually marked and located near the engine.
– **Use a Funnel**: Insert a funnel into the filler tube and pour in the new transmission fluid. Refer to the owner’s manual for the correct amount.
– **Check Level**: After adding fluid, use the dipstick (if available) to check the fluid level. The fluid should be at the appropriate level indicated on the dipstick.
7. **Start the Engine**:
– Start the engine and let it idle for a few minutes. This allows the new fluid to circulate through the system.
– While the engine is running, check for any leaks around the drain plug and cooler lines.
8. **Test Drive**:
– Take the bus for a short test drive, shifting through all the gears. This helps ensure the new fluid is properly distributed throughout the transmission.
– After the test drive, check the fluid level again and add more if necessary.
9. **Dispose of old Fluid**:
– Properly dispose of the old transmission fluid at a recycling center or an auto parts store that accepts used oil.
### Final Notes:
Flushing the transmission fluid can be a messy job, so be prepared for spills. If you’re uncomfortable performing any of these steps, it’s always best to consult a professional mechanic. Regular maintenance is key to keeping your Volvo F16 running smoothly!
A door handle is a crucial component of a vehicle that serves as the primary means for accessing the car’s interior. Typically located on the exterior of the vehicle, door handles come in various designs and functionalities, depending on the make and model of the car. The primary purpose of a door handle is to facilitate the opening and closing of car doors, allowing passengers and drivers to enter and exit the vehicle with ease.
Most modern vehicles feature door handles that are ergonomically designed for comfortable grip and operation. They can be categorized into two main types: traditional pull handles and electronic or push-button handles. Traditional handles often have a mechanical latch mechanism that requires physical pulling or pushing to unlock the door. In contrast, electronic handles may incorporate advanced technology, such as keyless entry systems, where sensors detect the presence of the key fob, allowing for seamless access without direct contact.
In addition to their primary function, door handles also contribute to the aesthetic appeal of the vehicle. manufacturers often design them to complement the overall style and design language of the car. The materials used for door handles can vary widely, ranging from durable plastics to premium metals, and they may be coated or finished to withstand weathering and wear.
Moreover, door handles can incorporate safety features, such as child locks or smart locking mechanisms, enhancing the security of the vehicle. In summary, door handles are not only functional components but also play a significant role in the user experience, security, and design of modern vehicles.