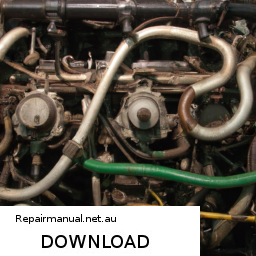
Repairing the gear shift linkage on a Deutz D engine involves several steps, each requiring attention to detail and an understanding of the components involved. click here for more details on the download manual…..
- Deutz BF8M1015CP Exhaust Gas Bend 4226962 5pcs of Deutz BF8M1015CP Exhaust Gas Bend 4226962 are shipped to our customer. Tks for the support from our customer.
- Everything You Need to Know About a Deutz Air-Cooled Diesel Deutz Allis in the shop for a valve set, let’s go over it while it’s here. Subscribe: http://bit.ly/SubDeboss | Merch: …
Below is a detailed guide on how to perform this repair.
### Tools and Materials Required:
1. **Tools:**
– Socket set
– Wrenches (metric and standard)
– screwdrivers (flathead and Phillips)
– Pliers
– Torque wrench
– pry bar
– Hammer
– Inspection mirror (optional)
– Flashlight
2. **Replacement Parts:**
– Gear shift linkage assembly (if damaged)
– Bushings or bearings (if worn)
– Cotter pins or retaining clips (if applicable)
– Lubricant (grease or oil)
– Gaskets (if required)
### safety Precautions:
– Ensure the engine is turned off and cooled down.
– Disconnect the battery to prevent accidental starts.
– Wear appropriate personal protective equipment (PPE), such as gloves and safety glasses.
### Steps to Repair Gear Shift Linkage:
#### 1. **Preparation:**
– Park the vehicle on a flat surface and engage the parking brake.
– Disconnect the battery to ensure safety during the repair.
#### 2. **Access the Gear Shift Linkage:**
– Depending on the specific model, you may need to remove the gear shift lever or access panel to reach the linkage.
– Use a screwdriver or wrench to remove any screws or bolts holding the panel or lever in place.
– Carefully set aside any removed components for reinstallation later.
#### 3. **Inspect the Linkage Components:**
– Examine the gear shift linkage for any signs of wear, damage, or misalignment. Key components to inspect include:
– **Linkage Rods:** Check for bends or breaks.
– **Bushings/Bearings:** Look for wear or degradation.
– **Joints/Couplings:** Ensure they move freely and are not rusted or corroded.
– **Retaining Clips:** Ensure they are intact and not missing.
#### 4. **Disassemble the Linkage:**
– Carefully disconnect the linkage rods from the transmission and gear shift lever. this may require removing cotter pins or retaining clips.
– Use pliers to pull out any pins or clips, and keep track of how everything is assembled for reinstallation.
#### 5. **Replace worn or Damaged Components:**
– If any components are found to be damaged or excessively worn, replace them with new parts.
– Install new bushings or bearings where necessary to ensure smooth operation.
– Apply lubricant to all moving parts to prevent wear and ensure smooth operation.
#### 6. **Reassemble the Linkage:**
– Reconnect the linkage rods to both the transmission and the gear shift lever, ensuring that all connections are secure.
– Replace any cotter pins or retaining clips that were removed during disassembly.
– Double-check alignments to ensure that everything is positioned correctly.
#### 7. **Test the Gear Shift Mechanism:**
– Before reinstalling any covers or panels, test the gear shift mechanism to ensure it engages smoothly in all gears.
– Move the gear shift lever through all positions and ensure the linkage responds appropriately.
#### 8. **Reinstall Covers and Components:**
– Once satisfied with the operation of the gear shift linkage, reinstall any panels or covers removed during the process.
– Secure them with screws or bolts, ensuring they are tight but not over-tightened.
#### 9. **Reconnect the Battery:**
– Reconnect the battery terminals and ensure they are secure.
#### 10. **Final Check:**
– Start the engine and test the vehicle’s transmission to ensure everything is functioning correctly.
– Take the vehicle for a short test drive to confirm that the gear shifting is smooth and responsive.
### Conclusion:
Repairing the gear shift linkage on a Deutz D Engine requires careful inspection and replacement of worn components. By following these detailed steps, you should be able to restore the functionality of the gear shift mechanism, ensuring reliable operation of the engine. Always consult the owner’s manual or service guide for specific torque specifications and procedures for your particular model.
A wheel cylinder is a crucial component in the drum brake system of a vehicle, primarily found in older vehicles and some modern designs. Its primary function is to facilitate the braking process by converting hydraulic pressure into mechanical force, which expands the brake shoes against the inner surface of the brake drum. The wheel cylinder is typically a cylindrical metal housing that contains two pistons, one for each brake shoe.
When the driver presses the brake pedal, the brake fluid is pushed from the master cylinder into the wheel cylinder. this hydraulic pressure forces the pistons outward, causing the brake shoes to make contact with the drum. this friction generates the necessary resistance to slow down or stop the vehicle.
Wheel cylinders are designed to operate under high pressure and extreme conditions, making them susceptible to wear and tear over time. Common issues include leaking brake fluid, which can compromise braking performance, or the pistons becoming stuck due to corrosion. Regular maintenance, including inspection and potential replacement, is essential to ensure the effective functioning of the brake system.
In summary, the wheel cylinder plays a vital role in the safety and performance of a vehicle’s braking system, making it an essential component for reliable stopping power.