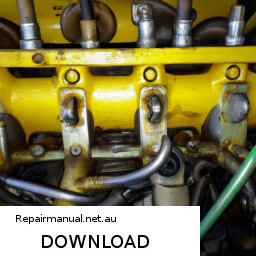
Replacing the serpentine belt on a Deutz 912 or 913 engine involves several steps and requires specific tools and knowledge of the engine’s components. click here for more details on the download manual…..
- Cylinder liner for Deutz 912 913 series diesel engine. Our engine parts are all in strict compliance with the requirements of Deutz original parts, which can be replaced freely.
- DEUTZ engine 913 with hino gear box
Below is a detailed guide to help you through the process.
### tools and Materials Needed:
1. **Tools:**
– Socket set (including metric sizes)
– Wrenches (including metric sizes)
– Screwdriver set (flathead and Phillips)
– Torque wrench
– Belt tensioner tool (if necessary)
– Pliers
– Crankshaft pulley removal tool (if required)
2. **Materials:**
– Replacement serpentine belt (ensure it matches the specifications for the Deutz 912 or 913)
– Belt dressing spray (optional, for better installation)
– Cleaning cloths
### Safety Precautions:
– Ensure the engine is off and cooled down before starting.
– Disconnect the battery to avoid any electrical issues during the replacement.
### Step-by-Step Procedure:
#### 1. Locate the Serpentine Belt
– The serpentine belt is a long, continuous belt that drives multiple peripheral devices in the engine, including the alternator, power steering pump, and water pump.
#### 2. Identify the Belt Routing
– Before removing the old belt, take a picture or note the routing of the belt around the pulleys. This will be crucial for installing the new belt correctly.
#### 3. Release Tension on the Belt
– Locate the belt tensioner. On Deutz engines, this is typically a spring-loaded pulley.
– Use a wrench or a serpentine belt tool to rotate the tensioner away from the belt. This will relieve tension on the belt, allowing you to remove it easily.
#### 4. Remove the Old Belt
– While holding the tensioner back, slide the belt off the pulleys. Start by removing it from the tensioner pulley and then work your way around the other pulleys.
– Inspect the old belt for signs of wear, such as cracks, fraying, or glazing.
#### 5. Inspect Pulleys and Tensioner
– Check the condition of the pulleys and the belt tensioner. Look for any signs of wear or damage. If any components are damaged, they should be replaced before installing the new belt.
#### 6. Install the New Serpentine Belt
– Refer to the picture or notes you took earlier and carefully route the new serpentine belt around the pulleys in the same configuration.
– Ensure that the belt is properly seated in the grooves of all pulleys.
#### 7. Reapply Tension
– Once the belt is in place, use the tensioner tool again to push the tensioner away from the belt.
– Slide the belt over the tensioner pulley while maintaining pressure on the tensioner. Release the tensioner slowly to apply tension to the belt.
#### 8. Double-Check Alignment
– After the installation, double-check that the belt is aligned correctly on all pulleys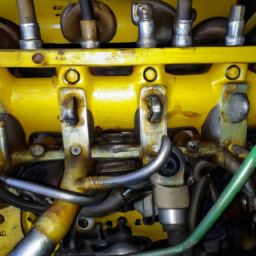 and that it is properly tensioned.
#### 9. Reconnect the Battery
– Reconnect the battery terminals securely.
#### 10. Start the Engine
– Start the engine and observe the serpentine belt in operation. Listen for any unusual noises and check for proper alignment and tension.
#### 11. Final Inspection
– After running the engine for a few minutes, check again to ensure everything is functioning properly. Look for any signs of slipping or misalignment.
### Conclusion
Replacing the serpentine belt on a Deutz 912 or 913 engine is a straightforward process if you follow these steps carefully. Always ensure you have the correct replacement parts and tools for the job, and consult the engine’s service manual for any specific instructions or torque specifications related to your engine model. If you encounter any issues, it may be beneficial to seek professional assistance.
The wheel is a fundamental component of a vehicle, playing a crucial role in its mobility and overall performance. Typically round and designed to rotate around an axle, wheels enable vehicles to move smoothly over various surfaces. They are made from a variety of materials, including steel, aluminum, and composite materials, each chosen for its strength, weight, and cost-effectiveness.
Wheels are generally composed of two main parts: the rim and the tire. The rim is the outer edge that holds the tire in place, while the tire provides traction, absorbs shocks, and facilitates contact with the road. Tires can vary significantly in tread pattern, width, and rubber composition, tailored for specific driving conditions, such as wet, dry, or off-road environments.
The design of wheels has evolved considerably over the years, with advancements in technology leading to lighter and more aerodynamic designs that can improve fuel efficiency and handling. Additionally, the diameter and width of a wheel can significantly affect a vehicle’s performance characteristics, influencing aspects such as acceleration, braking, and cornering stability.
Moreover, wheels are not only functional but also contribute to the aesthetic appeal of a vehicle. Customization options, including different finishes and styles, allow owners to enhance the visual impact of their cars. In summary, wheels are indispensable to vehicle dynamics, safety, and aesthetics, making them a vital aspect of automotive engineering.