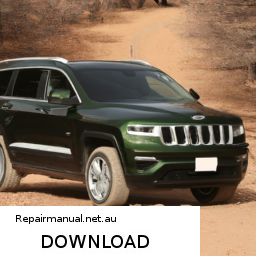
Replacing the trailing arm on a Jeep Grand Cherokee can be a straightforward task if you follow the steps carefully. click here for more details on the download manual…..
- 2014 grand Cherokee with straight pipes The video does not do it justice it is LOUD!
- How To Replace The Alternator On A Jeep Grand Cherokee With 3.6l Engine Brian Eslick from How to Automotive http://www.howtoautomotive.com takes you step-by-step through the process of replacing the …
The trailing arm is part of the vehicle’s suspension system, connecting the rear axle to the vehicle’s body. If you’re ready to get started, here’s a simplified guide to help you through the process:
### Tools and Materials Needed:
– **Tools**:
– Socket set (including extensions)
– Wrenches
– Jack and jack stands
– Torque wrench
– hammer (optional)
– Pry bar (optional)
– **Materials**:
– New trailing arm
– New bushings (if not included with the new arm)
– Lubricant or grease (for bushings)
### Safety First:
1. **Park the Car**: Make sure the Jeep is on a flat surface.
2. **Engage the Parking Brake**: This prevents the vehicle from moving while you work.
3. **Wear Safety Gear**: Use gloves and safety glasses to protect yourself.
### Step-by-Step Guide:
1. **Lift the Vehicle**:
– Use a jack to lift the rear of the Jeep.
– Place jack stands under the vehicle to support it securely before you start working underneath.
2. **Remove the Wheel**:
– Use a lug wrench to loosen and remove the lug nuts on the rear wheel where the trailing arm will be replaced.
– Take off the wheel and set it aside.
3. **Identify the Trailing Arm**:
– Locate the trailing arm; it extends from the rear axle to the vehicle’s frame.
4. **Remove the Old Trailing Arm**:
– Locate the bolts securing the trailing arm to both the rear axle and the vehicle’s frame.
– Use the appropriate socket or wrench to remove these bolts. You may need to spray them with penetrating oil if they’re rusted or stuck.
– If the bushing is stuck, you might need to tap it gently with a hammer or use a pry bar to help remove it.
5. **Install the New Trailing Arm**:
– Position the new trailing arm in place.
– Align it with the mounting points on the rear axle and the frame.
– Insert the bolts and hand-tighten them first to ensure proper alignment.
6. **Torque the Bolts**:
– Use a torque wrench to tighten the bolts to the manufacturer’s specified torque settings. This is important for safety and performance.
7. **Reinstall the Wheel**:
– Place the wheel back on the hub.
– Hand-tighten the lug nuts, then lower the vehicle slightly to put weight on the wheel before fully tightening the lug nuts in a crisscross pattern.
8. **Lower the Jeep**:
– Remove the jack s tands and lower the vehicle completely to the ground.
9. **Test Drive**:
– Take the Jeep for a short test drive to ensure everything feels normal and to check for any unusual noises.
### Final Tips:
– Make sure to check your work by inspecting the installation after a short drive, ensuring everything is tight and secure.
– If you’re unsure about any part of the process, consider seeking assistance from a more experienced friend or a professional mechanic.
And there you have it! With patience and attention to detail, you can successfully replace the trailing arm on your Jeep Grand Cherokee.
The emergency brake, also known as the parking brake or handbrake, is a crucial safety feature in vehicles designed to hold the car stationary when parked and to serve as an additional braking system in case of failure of the primary braking system. Typically activated by a lever located between the front seats, a pedal to the left of the driver’s footwell, or an electronic switch in modern cars, the emergency brake engages the rear wheels of the vehicle, preventing them from rolling.
Mechanically, the emergency brake operates independently from the main hydraulic brake system. In traditional systems, a cable connects the handbrake lever to the brake shoes or pads at the rear wheels. Pulling the lever tightens this cable, which forces the brake shoes against the drum or the brake pads against the rotor, effectively locking the wheels. In newer vehicles, electronic emergency brakes utilize a motor to apply pressure to the brakes, often engaging automatically when the vehicle is turned off or when the driver selects “Park” in an automatic transmission.
The emergency brake is particularly important for preventing vehicles from rolling away on inclines and is a legal requirement in many jurisdictions for vehicles parked on slopes. It also allows drivers to stop the vehicle in emergencies if the primary brakes fail, providing an essential layer of safety. Regular maintenance and checks are necessary to ensure the emergency brake remains functional, as neglect can lead to decreased effectiveness and potential safety hazards.