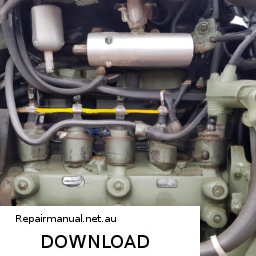
Repairing a dual-clutch transmission (DCT) on a Deutz TCD 2V engine can seem complex, especially for those with little mechanical experience. click here for more details on the download manual…..
- Deutz f4m 1011f engine not starting, priming injection pumps, timing belt In this video I go over what I have learned in last few weeks about this engine and how to figure out some of the problems with not …
- How a Diesel Governor Works In this video I show and explain how a typical governor works on a diesel engine. This video covers small auxiliary diesel engine …
However, I’ll break it down into simpler steps and concepts to make it easier to understand. Please remember that working on a transmission can be challenging, and it’s often best to consult a professional mechanic if you’re unsure.
### What is a Dual-Clutch Transmission?
A dual-clutch transmission is a type of automatic transmission that uses two separate clutches for odd and even gears. This allows for faster gear changes and improved efficiency.
### Safety First
Before starting any repair work, make sure to:
1. **Wear Safety Gear:** Use gloves and safety glasses.
2. **Disconnect the Battery:** This will prevent any electrical issues while you work.
### Tools You Will Need
– Basic tool set (wrenches, sockets, screwdrivers)
– Torque wrench
– Jack and jack stands or a lift
– Transmission fluid
– Cleaning supplies (rags, brushes)
### Step-by-Step Repair Process
#### 1. **Prepare the Vehicle**
– **Lift the Vehicle:** Use a jack to lift the vehicle and secure it with jack stands.
– **Remove the Wheels:** This may be necessary for better access, depending on the vehicle layout.
#### 2. **Access the Transmission**
– **Remove the Underbody Covers:** These may block access to the transmission.
– **Disconnect Drive Shafts:** You might need to remove these to access the transmission.
#### 3. **Drain the Transmission Fluid**
– **Locate the Drain Plug:** Find the transmission drain plug and place a container under it.
– **Drain the Fluid:** Remove the plug and let the fluid drain completely.
#### 4. **Remove the Transmission**
– **Unbolt the Transmission:** Carefully remove the bolts securing the transmission to the engine.
– **Disconnect Electrical Connections:** Label and disconnect any wiring or sensors connected to the transmission.
– **Carefully Slide the Transmission Out:** With help, if needed, slide the transmission away from the engine.
#### 5. **Inspect the Dual-Clutch Assembly**
– **Locate the Clutches:** The dual-clutch assembly will be visible once the transmission is off.
– **Check for Wear:** Look for signs of wear or damage on the clutches and surrounding components. If they are worn, they will need to be replaced.
#### 6. **Replace or Repair Components**
– **Replace Clutches if Necessary:** If the clutches are damaged, replace them with new ones. Follow the manufacturer’s specifications for installation.
– **Check Seals and Gaskets:** Replace any worn seals or gaskets to prevent leaks.
#### 7. **Reassemble the Transmission**
– **Reinstall the Clutch Assembly:** Once repairs are made, reinstall the dual-clutch assembly.
– **Reattach the Transmission:** Carefully slide the transmission back into place and secure it with bolts. Make sure to torque the bolts to the manufacturer’s specifications.
#### 8. **Reconnect Everything**
– **Reconnect Electrical Connections:** Reattach any wiring and sensors that were disconnected.
– **Reattach Drive Shafts:** If you removed them, reattach the drive shafts securely.
#### 9. **Refill Transmission Fluid**
– **Locate the Fill Plug:** Find the fill plug on the transmission.
– **Add New Transmission Fluid:** Using a funnel, add the recommended type and amount of transmission fluid.
#### 10. **Test the Repair**
– **Reconnect the Battery:** Once everything is back in place, reconnect the battery.
– **Start the Engine:** Check for any leaks or unusual noises.
– **Test Drive:** If everything looks good, take the vehicle for a short test drive to ensure the transmission operates smoothly.
### Final Thoughts
Repairing a dual-clutch transmission can be quite technical, and each vehicle may have specific steps or requirements. If at any point you Feel uncomfortable or unsure, it’s always best to seek help from a professional mechanic. Regular maintenance and timely repairs can extend the life of your transmission and improve vehicle performance.
An oil cooler line is an essential component in the lubrication system of a vehicle, particularly in engines that generate significant heat during operation. Its primary function is to transport engine oil to and from the oil cooler, which helps maintain optimal oil temperatures and, consequently, the overall health of the engine.
Typically made from durable materials, such as rubber or metal, oil cooler lines are designed to withstand high pressures and temperatures. They play a crucial role in preventing the engine oil from overheating, which can lead to reduced lubrication efficiency, increased wear on engine components, and ultimately, engine failure. The oil cooler itself serves as a heat exchanger, dissipating excess heat from the oil as it flows through the cooler, which is often air or liquid-cooled.
Oil cooler lines are usually routed from the engine oil pump to the oil cooler and then back to the engine. Their placement and condition are vital; any leaks or damage can result in a loss of oil pressure, leading to serious engine problems. Regular inspection and maintenance of these lines are crucial, especially in high-performance or heavy-duty vehicles, where the demands on the engine are more intense. In summary, oil cooler lines are a vital component in maintaining engine efficiency and longevity by regulating oil temperature.