Replacing the EGR (Exhaust Gas Recirculation) valve on a Mercedes Benz G-Class G350GD Turbo Kurz W463 requires careful attention to detail and the right tools. click here for more details on the download manual…..
- Test drive ultra rare Mercedes 500GE for sale Test drive ultra rare Mercedes 500GE for sale.
Below is a detailed guide to help you with the process:
### Tools and Equipment Needed
– **Socket Set**: A complete metric socket set (including deep sockets) will be necessary to remove various bolts and nuts.
– **Ratchet and Extensions**: A ratchet with extensions for reaching tight spots.
– **Torque Wrench**: To ensure bolts are tightened to the manufacturer’s specifications.
– **Screwdrivers**: A flathead and Phillips screwdriver for clamping and securing hoses.
– **Pliers**: Needle-nose and standard pliers to remove hose clamps.
– **EGR Valve Gasket**: A new gasket to ensure a proper seal when reassembling.
– **Cleaning Supplies**: Carburetor cleaner or throttle body cleaner, rags, and a wire brush for cleaning surfaces.
– **Vacuum Hose Disconnect Tool**: To safely detach any vacuum lines without damage.
– **Safety Gear**: Gloves, safety glasses, and potentially a face mask to protect from fumes and debris.
### Preparation Steps
– **Disconnect the Battery**: Always disconnect the negative terminal of the battery to avoid any electrical issues or shorts while working.
– **Gather Parts**: Ensure you have the replacement EGR valve and a new gasket ready for installation.
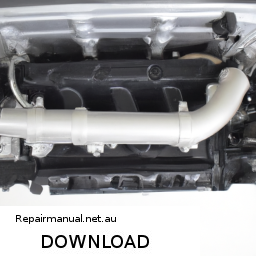
– **Identify the EGR Valve Location**: The EGR valve is typically located near the engine’s intake manifold. Consult the vehicle’s service manual for exact positioning.
### Removal Process
– **Remove Engine Cover**: If applicable, unscrew and lift off the engine cover to access the EGR valve.
– **Disconnect vacuum Lines**: Use the vacuum hose disconnect tool to safely remove any vacuum hoses connected to the EGR valve.
– **Unplug Electrical Connectors**: Carefully disconnect any electrical connectors from the EGR valve using pliers or your fingers, depending on the tightness.
– **Unbolt the EGR Valve**: Using the socket set, remove the bolts securing the EGR valve to the intake manifold. Keep track of the bolts for reinstallation.
– **Remove the EGR Valve**: Gently pull the EGR valve away from the mounting surface. If it’s stuck, wiggle it slightly or use a soft mallet to coax it free.
### Cleaning
– **Clean the Mounting Surface**: Use a wire brush and cleaning spray to remove carbon buildup from the intake manifold and around the mounting area. Ensure the surface is smooth and free of debris for a proper seal.
– **Inspect the Old EGR Valve**: Check the old EGR valve for damage or excessive wear, which could indicate other engine issues.
### Installation Process
– **Install New EGR Valve**: Place the new EGR valve onto the cleaned mounting surface, ensuring the new gasket is correctly aligned.
– **Bolt the EGR Valve**: Reinstall the bolts to secure the EGR valve, using the torque wrench to tighten them to the manufacturer’s specifications (consult the service manual for specific torque values).
– **Reconnect Electrical Connectors**: Plug in any electrical connectors that were disconnected earlier, ensuring they are secure.
– **Reattach vacuum hoses to the EGR valve, ensuring they are fitted tightly and securely.
### final Steps
– **Reinstall Engine Cover**: If the engine cover was removed, place it back on and secure it with the appropriate screws.
– **Reconnect the Battery**: Reattach the negative battery terminal and ensure it is tight.
– **Start the Engine**: Turn on the vehicle to check for proper operation. Listen for any unusual sounds and observe the engine performance.
– **Check for Leaks**: Inspect around the EGR valve and hoses for any signs of leaks or issues.
### Post-Replacement Considerations
– **Diagnostic Check**: If your vehicle has an OBD-II system, consider using a scanner to check for any error codes after replacement. Clear any codes if necessary.
– **Test Drive**: Take the vehicle for a short test drive to ensure everything operates normally and the check engine light (if applicable) remains off.
By following these steps and guidelines, you should be able to successfully replace the EGR valve on a Mercedes Benz G-Class G350GD Turbo Kurz W463. Always refer to the specific service manual for your vehicle for any additional details or specifications.
The stabilizer bar, also known as an anti-roll bar or sway bar, is a crucial component in the suspension system of a vehicle. Its primary function is to reduce body roll during cornering, enhancing the vehicle’s stability and handling characteristics. Typically made of steel, the stabilizer bar is a torsional spring that connects the left and right wheels of the axle. Its design allows it to resist the lateral forces that occur when a vehicle turns, which helps to maintain a level stance and improves tire contact with the road.
When a vehicle turns, the weight shifts to one side, causing the body to lean outward. The stabilizer bar counteracts this lean by transferring some of the load from the outer wheel (the wheel on the side of the turn) to the inner wheel (the wheel on the opposite side). This transfer helps balance the vehicle and prevents excessive body roll, which can lead to loss of traction and control.
Moreover, stabilizer bars can vary in stiffness, which affects the handling characteristics of the vehicle. A stiffer bar can provide better handling performance but may result in a harsher ride, while a softer bar may offer a more comfortable ride at the expense of handling precision. Overall, the stabilizer bar is integral to ensuring a safe and comfortable driving experience, making it an essential component of modern vehicle design.