
Sure! click here for more details on the download manual…..
- Jeep Cherokee owners frustrated by transmission problems Channel 2’s Jim Strickland reports.
- Jeep Cherokee: Muffler & Tailpipe Replacement – Flowmaster Super 40 Delta Flow [‘84-‘01 X… Welcome to the description, where you will always find more about the video and the things in it. I installed a Flowmaster Super 40 …
Replacing the muffler on a Jeep Cherokee can be a straightforward process, but it does require some basic tools and a little patience. Here’s a step-by-step guide to help you understand how to do it, even if you have little mechanical experience.
### Tools and Materials Needed:
1. **New Muffler**: make sure it’s the right size and type for your Jeep Cherokee.
2. **Wrenches or socket Set**: These will help you remove bolts.
3. **Pipe Cutter or Hacksaw**: If the old muffler doesn’t have flanges (the flat parts that connect it to the exhaust pipes) or if you need to cut the pipe.
4. **Jack and Jack Stands**: To lift the vehicle safely if needed.
5. **Safety Glasses and Gloves**: Protect your eyes and hands.
6. **Exhaust Pipe Clamp or Hangers**: In case you need new ones to attach the muffler.
### Steps to Replace the Muffler:
1. **Prepare the Vehicle**:
– **Safety First**: Park your Jeep on a level surface, turn off the engine, and let it cool down. Put on your safety glasses and gloves.
– **Lift the Vehicle**: If you need more room to work, use a jack to lift the rear of the Jeep and place jack stands underneath for safety.
2. **Locate the Muffler**:
– The muffler is usually located near the back of the vehicle, along the exhaust system. It’s a metal canister that helps reduce noise from the engine.
3. **Inspect the Current Muffler**:
– Look at how the old muffler is connected. It may be held in place with bolts or clamps. Take note of how everything is connected, as this will help you when you install the new muffler.
4. **Remove the Old Muffler**:
– **Loosen the Bolts or Clamps**: Use your wrenches or socket set to loosen and remove the bolts or clamps holding the muffler in place. If it’s rusted, you might need to apply some penetrating oil to help loosen it.
– **Cut the Pipe (if necessary)**: If the muffler is welded on or you can’t remove it easily, you might need to cut it off using a pipe cutter or hacksaw. Be careful not to cut the exhaust pipes; just cut through the muffler itself.
– **Take Out the Muffler**: Once it’s loose, carefully remove the old muffler from the exhaust system. You might need to wiggle it a bit to get it free.
5. **Install the New Muffler**:
– **Position the New Muffler**: Place the new muffler in the same position as the old one. make sure the inlet (where it connects to the exhaust pipe) and outlet (where exhaust exits) are oriented correctly.
– **Secure the Muffler**: Use the bolts or clamps to attach the new muffler to the exhaust pipes. If you’re using clamps, make sure they are tight enough to prevent leaks but be careful not to overtighten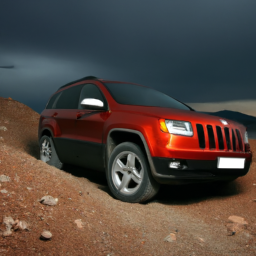 and damage the muffler.
6. **Check Hangers**:
– Ensure that the new muffler is securely hanging from the exhaust hangers. If the old hangers are damaged, replace them with new ones to prevent the muffler from sagging or moving.
7. **Double-Check Connections**:
– Go over all the connections to ensure everything is tight and secure. this will help prevent exhaust leaks.
8. **Lower the Vehicle**:
– If you lifted the vehicle, carefully remove the jack stands and lower the Jeep back to the ground.
9. **Test the New Muffler**:
– Start your Jeep and listen for any unusual sounds. make sure there are no leaks at the connections. If everything sounds good, you’re all set!
### Final Tips:
– It’s always a good idea to consult your vehicle’s manual for specific details related to your Jeep Cherokee model.
– If you encounter any difficulties or Feel uncomfortable at any step, it’s best to seek help from a professional mechanic.
And that’s it! You should now have a new muffler on your Jeep Cherokee. Happy driving!
The dashboard is a critical component of a vehicle’s interior, serving as the primary interface between the driver and the vehicle’s essential functions. Located directly in front of the driver, it is designed to house various instruments and controls that provide vital information about the vehicle’s status and facilitate its operation. The dashboard typically includes a speedometer, fuel gauge, temperature gauge, and warning lights, which collectively inform the driver of the car’s speed, fuel levels, engine temperature, and any potential malfunctions or alerts.
In modern vehicles, dashboards have evolved from simple analog displays to sophisticated digital interfaces. Many contemporary dashboards feature LCD or LED screens that can display a wide range of information, including navigation directions, multimedia controls, and vehicle settings. These screens often support touch functionality and can integrate with smartphones and other devices, providing a seamless user experience.
Additionally, the dashboard incorporates various controls such as the climate control system, audio system, and, in some cases, advanced driver-assistance systems (ADAS). The layout and design of the dashboard are crucial for ergonomics and usability, ensuring that the driver can access necessary information and controls without distraction. Safety features, such as airbags, are often integrated into the dashboard design, enhancing passenger protection in the event of a collision. Overall, the dashboard is not just a functional element; it represents the intersection of technology, design, and user experience in modern automotive engineering.