
Replacing the transmission output shaft on a JCB 802.4 excavator involves several steps and requires specific tools and safety precautions. click here for more details on the download manual…..
Below, I will outline a detailed procedure, including the necessary components, tools, and steps involved in this process.
### Tools and Equipment Needed
1. **Basic Hand Tools:**
– Wrenches (metric and imperial)
– Socket set
– Screwdrivers
– Pliers
– Hammer
– Pry bar
2. **Specialized Tools:**
– Torque wrench
– Gear puller (if necessary)
– Transmission Jack or suitable lifting device
– Safety glasses and gloves
– oil catch pan
3. **Replacement Parts:**
– New output shaft
– Seals and gaskets (if required)
– Transmission fluid
4. **Service Manual:**
– A JCB service manual for the 802.4 excavator for torque specifications and diagrams.
### Safety Precautions
– Ensure the excavator is on a level surface and secured with wheel chocks.
– Disconnect the battery to prevent any electrical accidents.
– Wear appropriate personal protective equipment (PPE) including gloves and safety glasses.
– Be cautious of hydraulic fluid; check for leaks before starting work.
### Step-by-Step Procedure
#### 1. Preparation
– **Park the Excavator:** Ensure the machine is on a flat surface, and engage the parking brake.
– **Disconnect the Battery:** Remove the negative terminal to prevent any electrical issues during the operation.
#### 2. Drain Transmission Fluid
– Place an oil catch pan under the transmission.
– Remove the transmission drain plug and allow the fluid to drain completely.
– Replace the drain plug once drained.
#### 3. Remove the Transmission
– **Access:** Depending on your model, you may need to remove the cab or side panels to access the transmission.
– **Disconnect Components:** Remove any components connected to the transmission, which may include:
– Drive shafts
– Linkages
– Electrical connectors
– Hydraulic lines (if applicable)
– **Support the Transmission:** Use a transmission Jack to support the transmission while you detach it from the engine.
– **Unbolt the Transmission:** Carefully remove the bolts securing the transmission to the engine and lower it slowly.
#### 4. Remove the Old Output Shaft
– **Disassemble the Transmission:** Once the transmission is removed, place it on a clean workbench.
– **Access the Output Shaft:** Depending on the design, you may need to remove the transmission housing cover.
– **Remove the Output Shaft:** Using a gear puller, extract the output shaft. Take care to note the orientation and position of any shims or spacers.
– **Inspect Components:** Check the old output shaft, bearings, and seals for wear or damage.
#### 5. Install the New Output Shaft
– **Prepare for Installation:** Clean the output shaft housing and ensure all mating surfaces are free of debris.
– **Install New Seals:** If applicable, install new seals around the output shaft.
– **Insert the New Output Shaft:** Carefully insert the new output shaft into the transmission casing.
– **Reassemble the Transmission:** Reinstall any covers and ensure all components are torqued to the specifications provided in the service manual.
#### 6. Reinstall the Transmission
– **Lift the Transmission:** Using the transmission jack, carefully lift the transmission back into position.
– **Align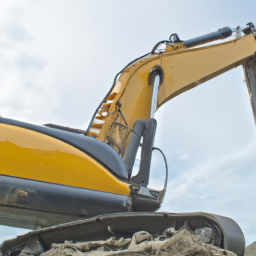 and Bolt:** Align the transmission with the engine and secure it with the appropriate bolts. Torque them to the specifications in the service manual.
– **Reconnect Components:** Reattach all the components that were previously removed, ensuring proper connection of electrical and hydraulic systems.
#### 7. Fill Transmission Fluid
– **Refill Transmission:** Remove the fill plug and pour in the new transmission fluid until it reaches the recommended level as per the service manual.
– **Replace Fill Plug:** Ensure the fill plug is securely in place.
#### 8. Testing
– **Reconnect the Battery:** Reconnect the negative battery terminal.
– **Start the Engine:** Start the excavator and allow it to reach operating temperature.
– **Check for Leaks:** Inspect for any signs of fluid leaks around the transmission and output shaft area.
– **Test Functionality:** Operate the excavator controls to ensure everything is functioning properly.
### Final Notes
– Always refer to the specific service manual for the JCB 802.4 for detailed diagrams and torque specifications.
– If you are unsure about any step in the process, consult with a professional mechanic or technician familiar with JCB equipment.
This detailed guide should provide a comprehensive overview of replacing the transmission output shaft on a JCB 802.4 excavator. Proper attention to detail, safety, and adherence to the service manual will ensure a successful replacement.
The shifter linkage is a crucial component in a vehicle’s transmission system that connects the gear shifter (or gear lever) inside the cabin to the transmission itself, which is usually located in the engine bay. This linkage translates the driver’s input from shifting gears into mechanical movements that engage the appropriate gears within the transmission. It is vital for both manual and automatic transmissions, although the design and function may vary between the two.
In manual transmission vehicles, the shifter linkage typically consists of rods, cables, or levers that connect the gear stick to the transmission. When the driver moves the gear lever, the linkage transmits this motion to the transmission, allowing the driver to select different gears as needed for acceleration, deceleration, or cruising. Properly functioning shifter linkage ensures smooth and accurate gear changes, which are essential for optimal vehicle performance and safety.
In automatic transmission vehicles, the shifter linkage has a similar role but is often more complex, incorporating additional components such as solenoids and sensors that communicate with the vehicle’s computer to determine the appropriate gear based on speed and throttle input. Any issues with the shifter linkage, such as misalignment, wear, or damage, can lead to difficulties in gear selection, resulting in poor driving performance and potentially dangerous situations on the road. Therefore, regular inspections and maintenance of the shifter linkage are essential for the overall health of the vehicle’s transmission system.